

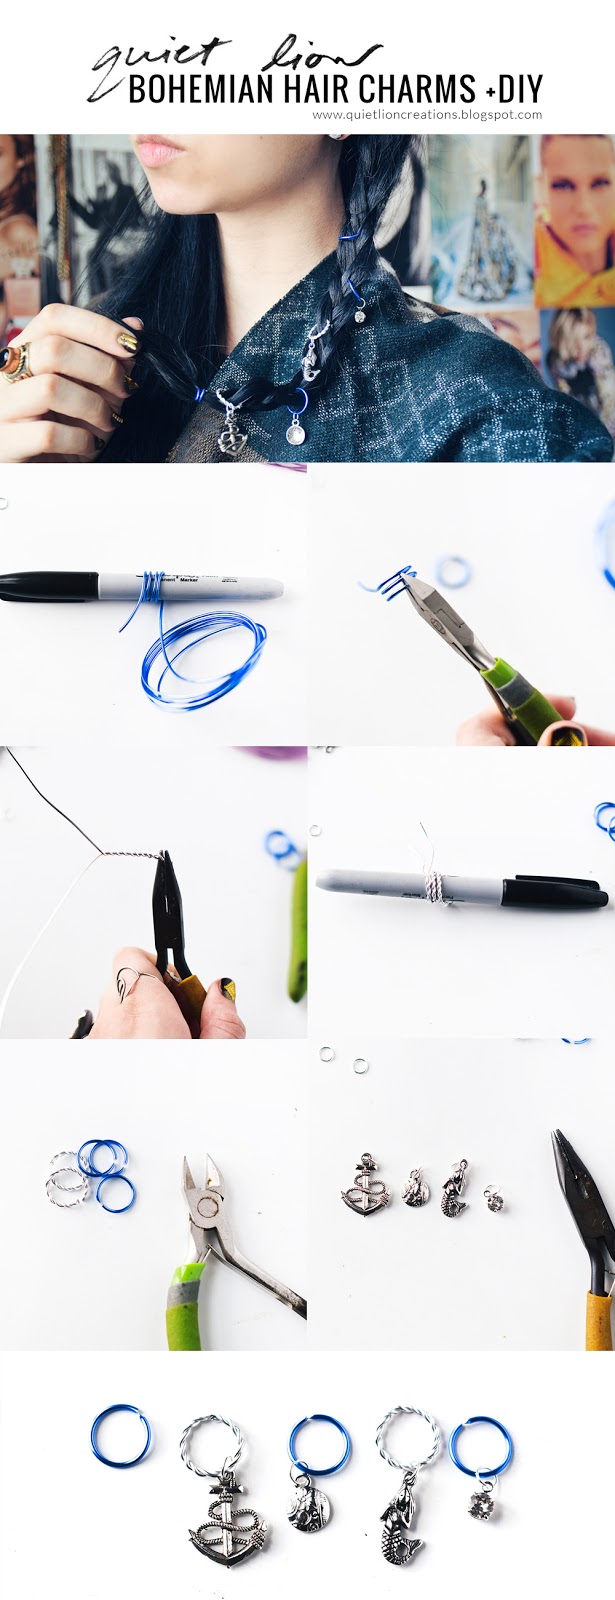
My prettiesŌĆ”.these DIY Hair Ring Charms come together in minutes - but add a bohemian flair to any braid or updo.
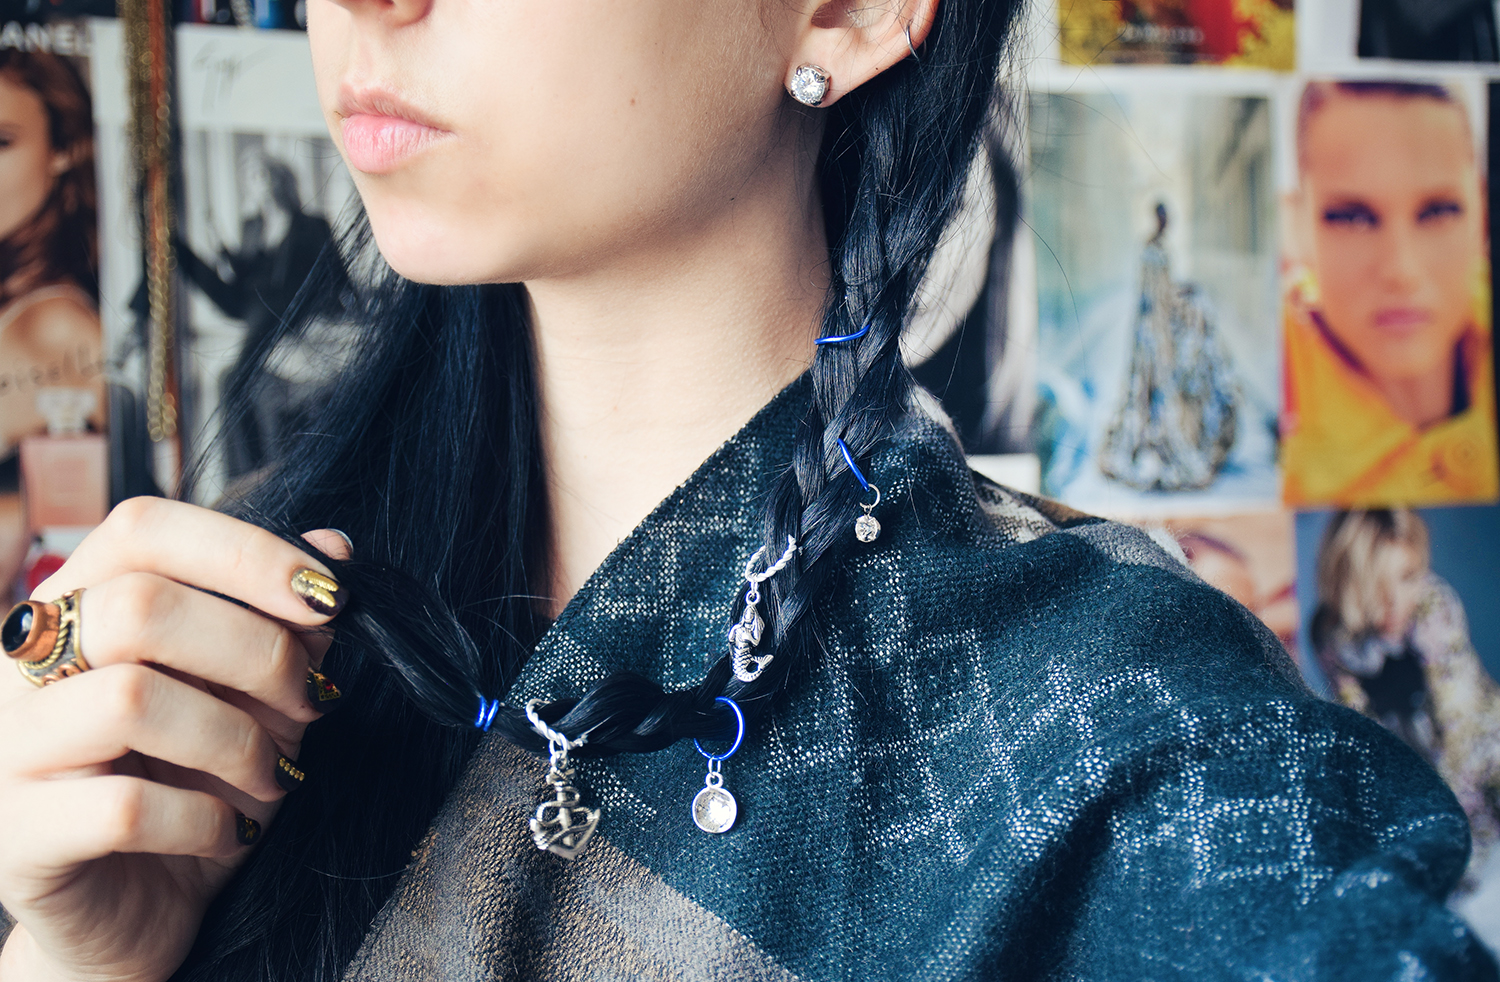
I quickly added them to my braid for this pic - but I love adding them to buns as well. The rings simply twist open and closed and are lightweight - add charms or keep them plain depending on your outfit.
This tutorial is a no-brainer - soft aluminum wire is the perfect base for these flexible rings (which are essentially large jump rings!) allowing for a variety of styles. Twist the wire for texture - keep it plain for sleek chicness.
With the rise of festival fashion and Coachella, hair jewelry is definitely up-trending. A lot of hair clips or jewelry only work on long hair - if youŌĆÖve got short hair, create a small braid and add these puppies in. Check.
Are we ready?!

Step 1: Gather materials. Needed are: jump rings (4mm or 6mm), an assortment of bohemian charms, a sharpie or marker (to mold the wire around) and 16g / 18g wire. I used aluminum wire - itŌĆÖs easy to bend. You will also need wire cutters for snipping the wire.

Step 2: Wrap 16g aluminum wire around the Sharpie - wrap 4 or 5 times.
Step 3: Remove the wraps from the Sharpie by gently sliding them off. Cut at the top of each wrap to create the rings.

Cut at the same spot on each wrap for perfect rings!

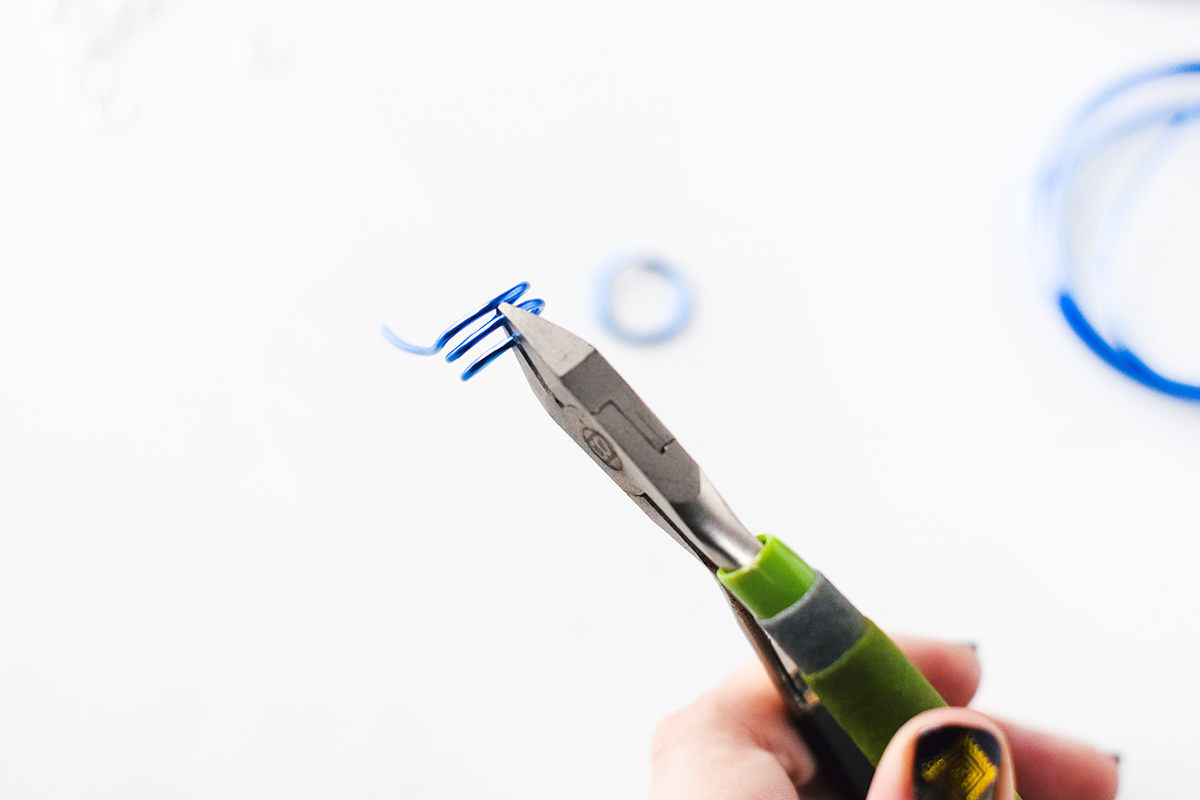
Step 4: To make the twisted rings, cut 8ŌĆ│ of 18g wire. Fold in half, and hold this halfway point with the pliers. Twist the wires together, holding strong and making the wraps tight.

Step 5: Wrap around the SharpieŌĆ”.

Cut the twisted wire to create more rings.

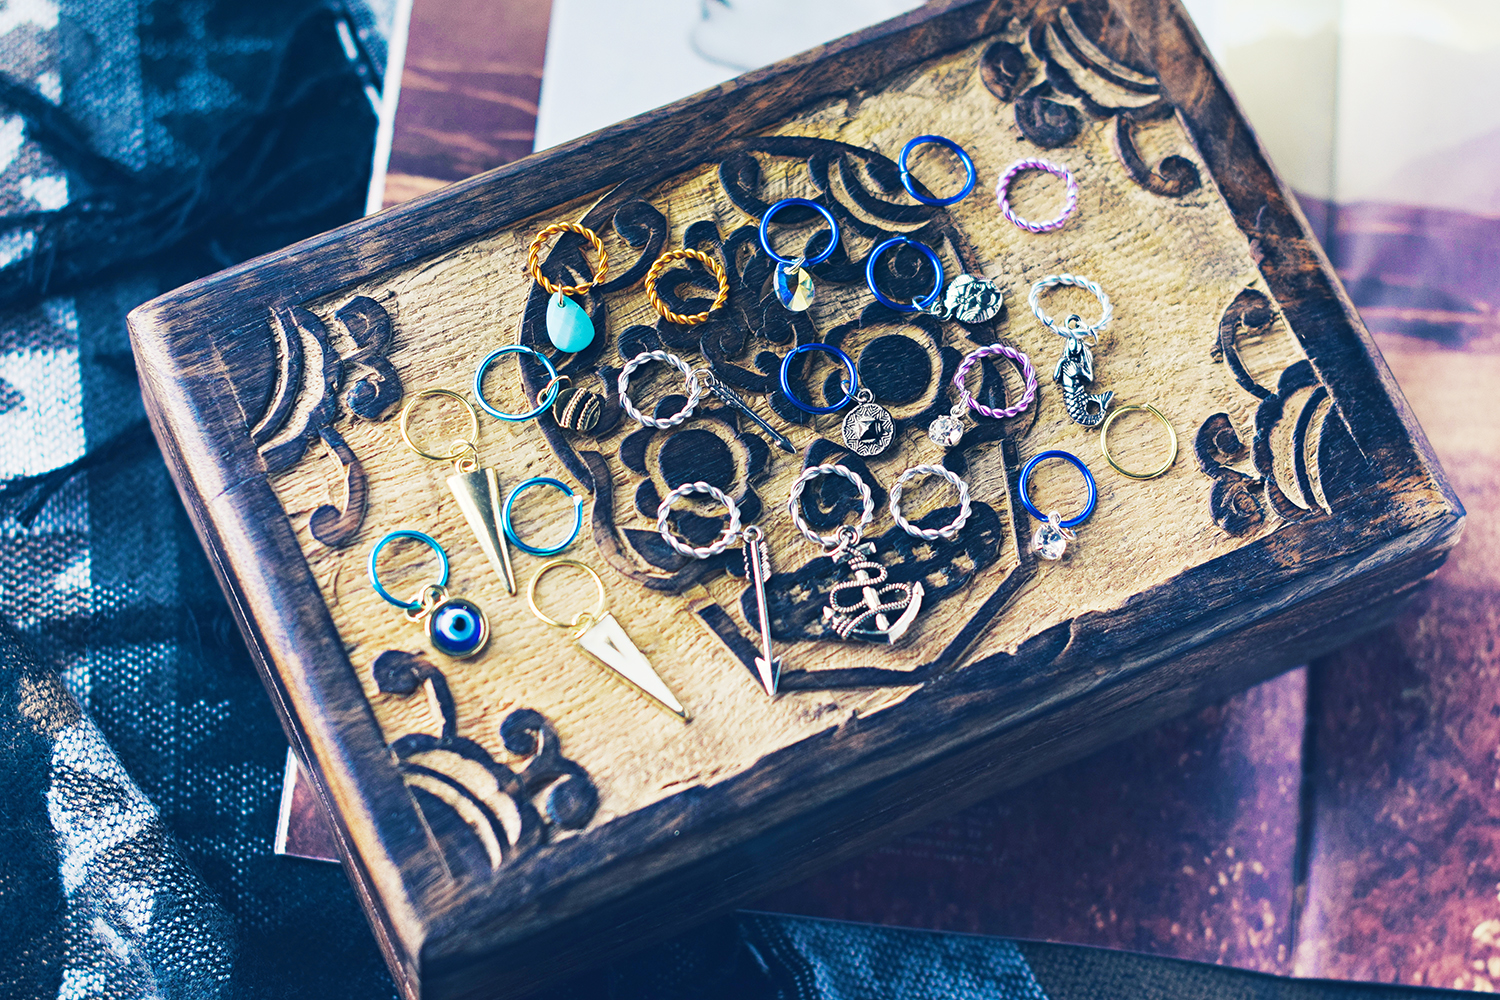
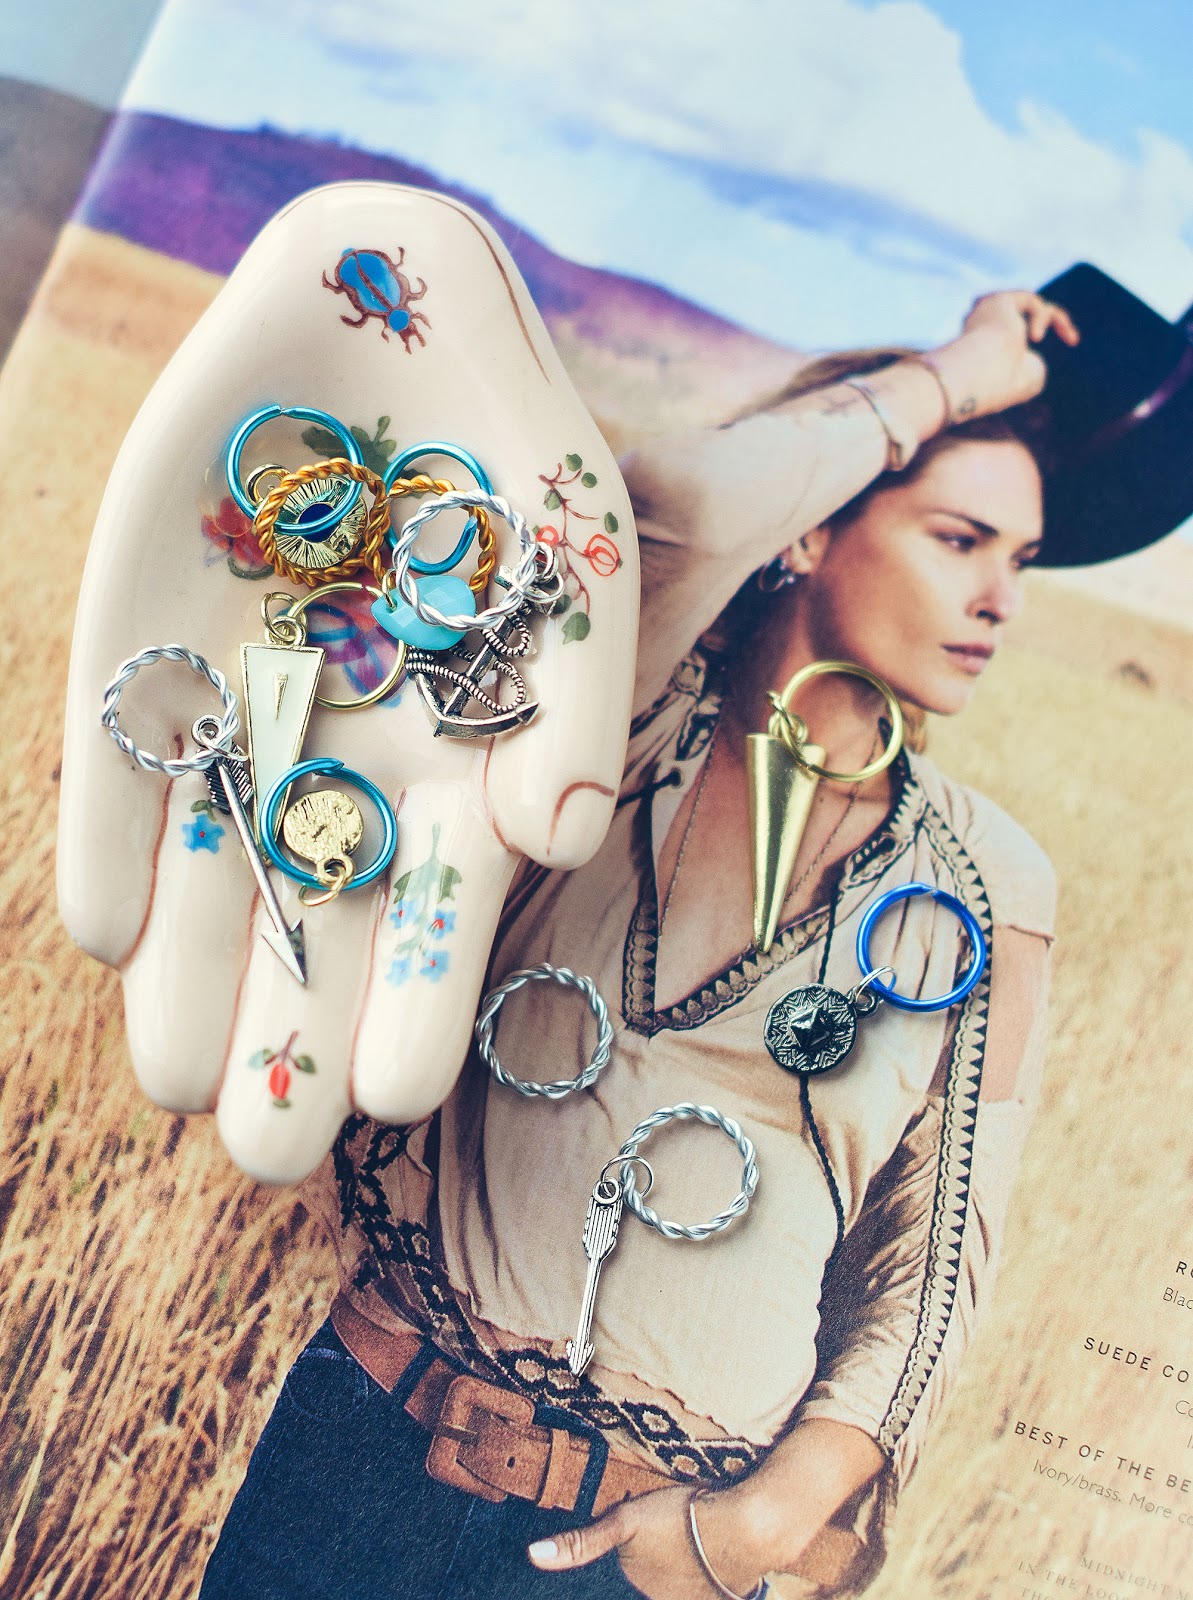
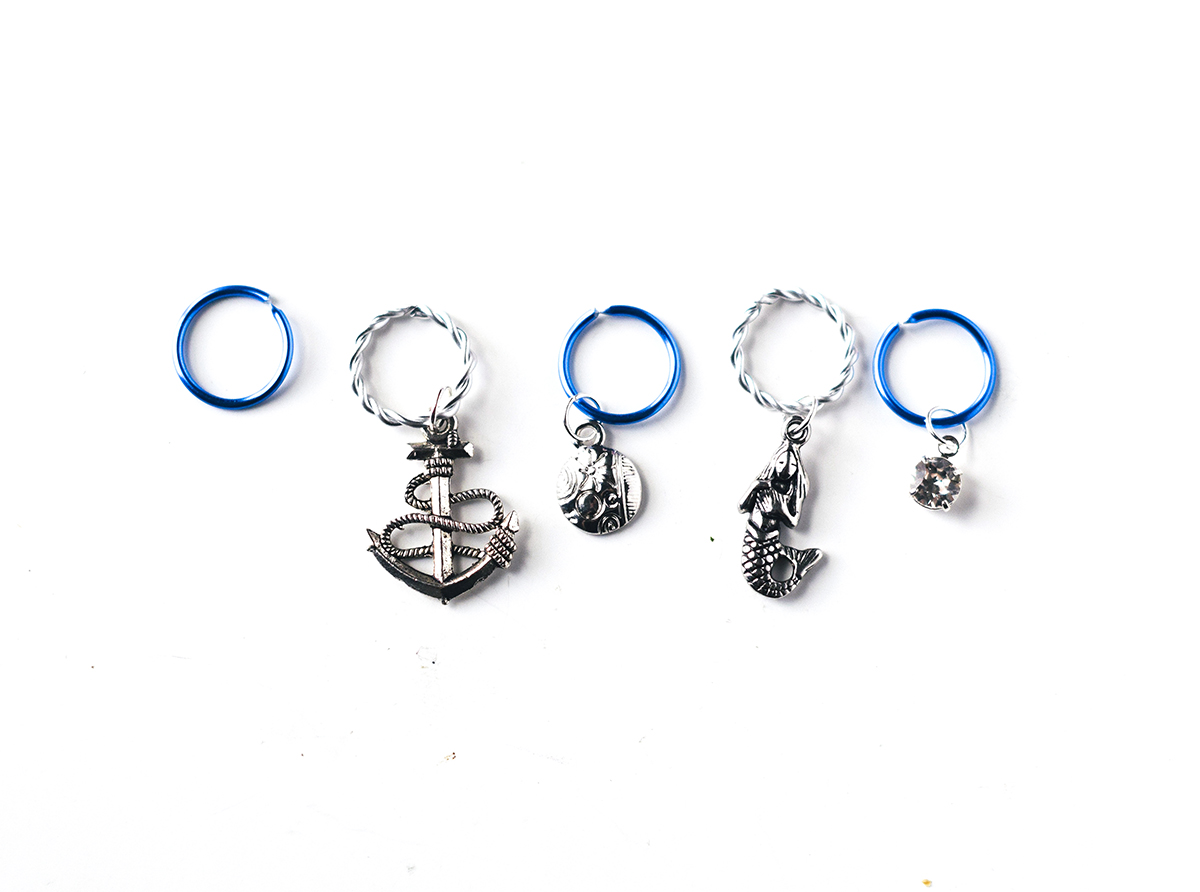
You can choose to leave your rings plain or adorn with charms - I say, adorning with charms is always preferred! Simply attach 6mm jump rings to each charm.
┬Ā ┬Ā
Slide the charms on the wire rings and then bend to close. DonŌĆÖt ever PULL the rings! TWIST them to open and close - it will keep their shape. Promise me you wonŌĆÖt pull!!! ¤Öé

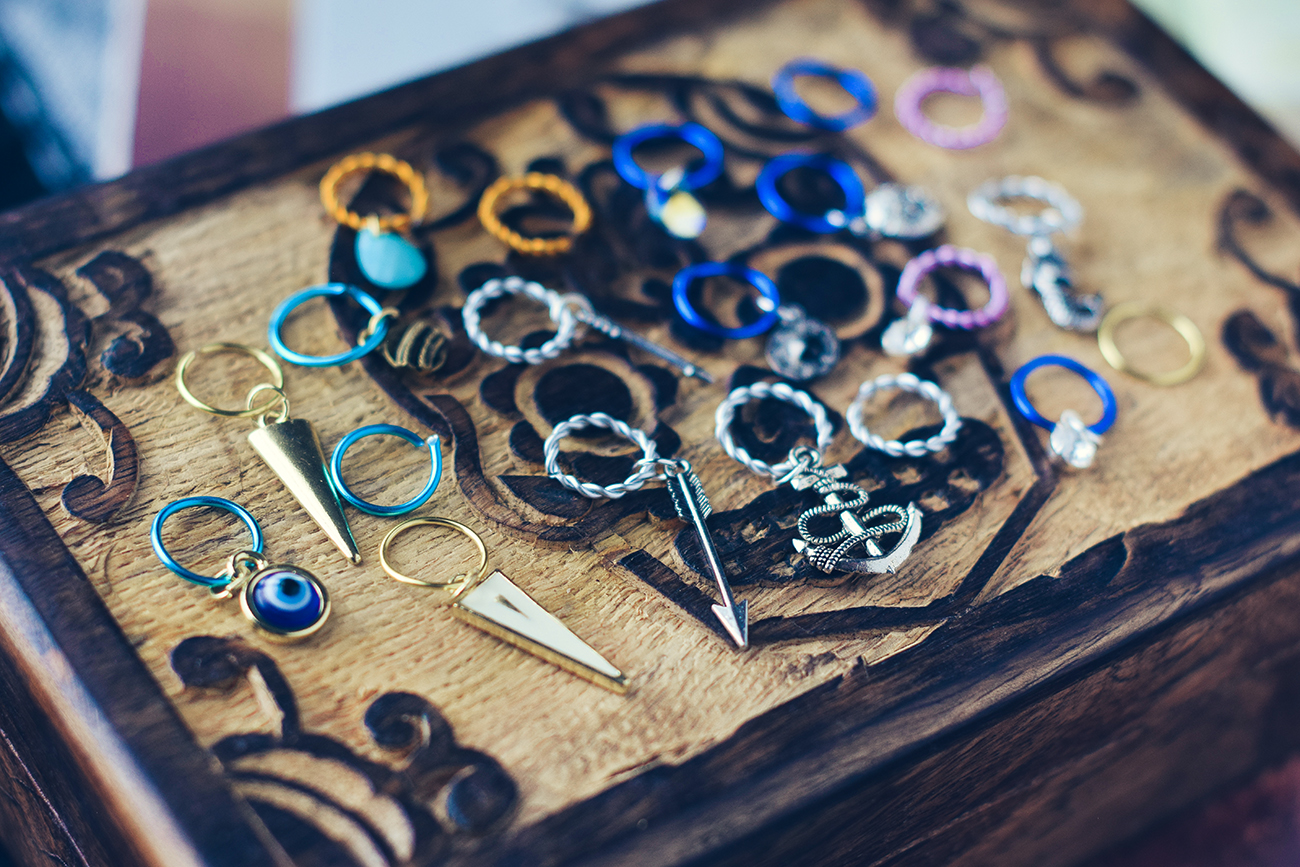
Create these in a variety of themes and colors for every outfit. They are totally reusable too.
Took me much longer to actually write this tutorial than it did to create these sparklies. If you follow this DIY and create your own - post a pic to insta and tag me┬Ā@quietlioncreations - IŌĆÖll repost you!
 clever curiosities, shiny sparklies, delightful discoveries, overall good vibes.
ŌśĮ crafty in Chicago since 2011 Ōśå
clever curiosities, shiny sparklies, delightful discoveries, overall good vibes.
ŌśĮ crafty in Chicago since 2011 Ōśå 


