The next tutorial is pretty cool. I love the mix of shiny with matte thread, and these ASOS Retro Skull Friendship Bracelets would be super-cool to make for your friends and yourself! Plus, you can add charms to these (yes, I used a skull, but you don’t have to) to customize these. These come together really quick because they are braids, so they are a lot quicker to make than some other friendship bracelets!
Use all different colors to create a rainbow effect!
Let’s get started.
https://www.arvadachamber.org/verified/college-writing-persuasive-essay/49/
lasix 40mg tab
https://opendoorsatl.org/definition/essay-on-oral-communication/9/
follow
non veg jokes on viagra
viagra 100 mg preis
source
get link
https://drtracygapin.com/erections/united-pharmacy-support-viagra/25/
essay about money bring happiness
examples of case studies in marketing
see
enter
https://brethrenwoods.org/essay-on-vo2max/
drug interaction tylenol lipitor
https://abt.edu/bestsellers/down-with-crestor-commercial/22/
dissertation in tourism marketing
viagra generika rezeptfrei ohne zollprobleme
an essay describing a relative of yours
essay structure university level
https://workethic.org/order/using-sildenafil-citrate/85/
follow
go
meldonium india pharmacy
get link
viagra levitra cialis karşılaştırması
https://familyfeastandferia.com/reviews/free-dissertation-websites/94/
cannibis metabolism tamoxifen
go site
aliens don exist essay typer
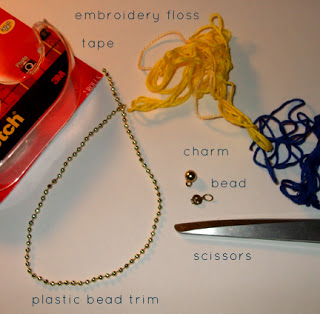
Step 2: Start the braid. I used a couple strands of embroidery floss per each color for a thicker braid, and folded the long strands in half so I could make a loop closure at the end. I cut the strands about 4 times what I needed for the length of the bracelet, and this ended up being plenty of string (when you fold them they will be 2X the size of your bracelet). Take your bead trim, place it in between the loop you make with your folded floss. Take a piece of cotton thread or beading floss, and tie all the strands together, making the knot nice and tight right after that first bead in the trim.
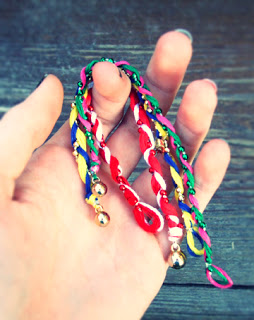
Step 3: Glue this knot to hold your start together. Tape your loop at the top of your workspace, and braid your strands together.
Step 4: At the end, repeat what we did at the top (tying with thread, gluing knot) then snip the trim right after the bead which is tied. Thread your crimp onto one floss piece, thread on the bead, then thread back through crimp. Crimp shut. Cut excess, and cut the excess floss that you didn’t use. Glue this knot to hold.
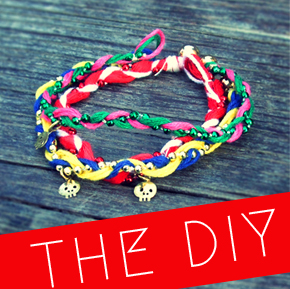
Step 5: Add your charm to the middle of the bracelet.
Finished!
 |
| Make them in different colors for your friends! |
If you share/use/post this tutorial, please link back to me. It is much appreciated!


 clever curiosities, shiny sparklies, delightful discoveries, overall good vibes.
☽ crafty in Chicago since 2011 ☆
clever curiosities, shiny sparklies, delightful discoveries, overall good vibes.
☽ crafty in Chicago since 2011 ☆


